Banana Birthday Muffins? 10/30/2010
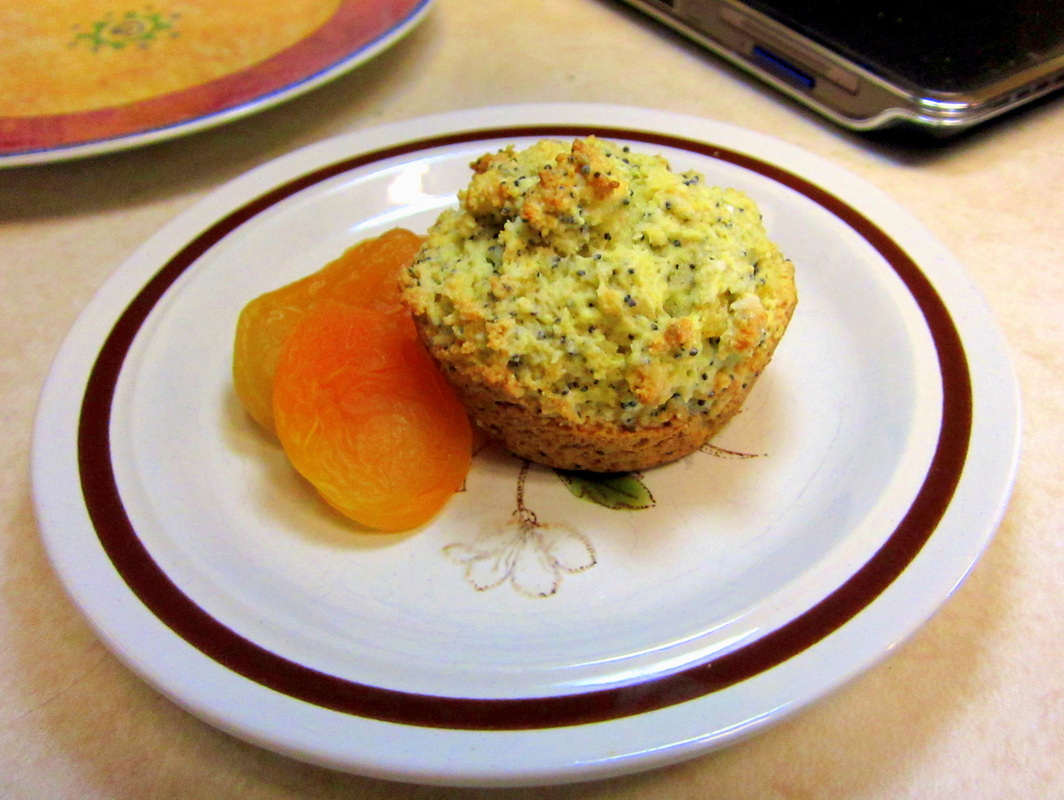
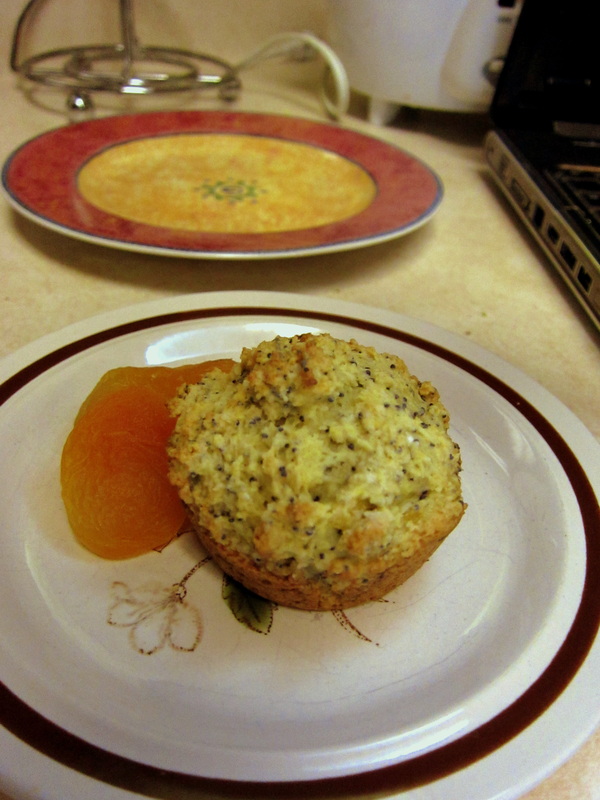
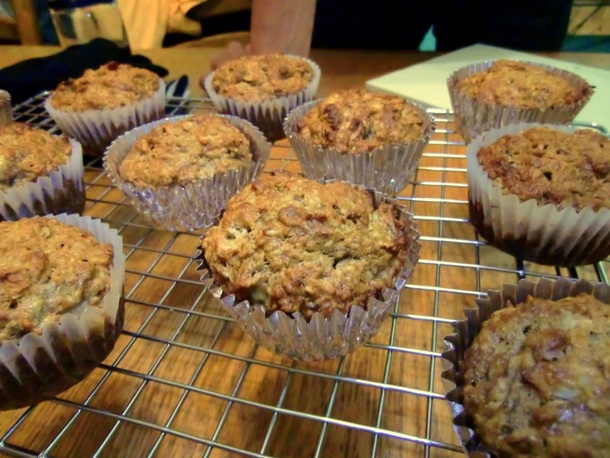
When it comes to birthdays, light, fluffy cakes seem to be the accepted treat of choice. This can take the form of a massive, multi-tiered production with elaborate fondant decorations or a simple selection of cupcakes with a delicate frosting swirl on top. That's what I thought I was going to do when I offered to bake a friend something for her birthday. However, after flipping through pictures from recipe books, she settled on a muffin, specifically a banana, oatmeal muffin. These dense, breakfast muffins are a healthier, and just as tasty alternative to the sugar coma inducing alternative. ![]() 
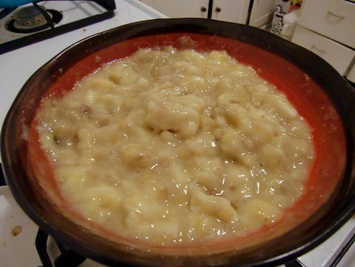
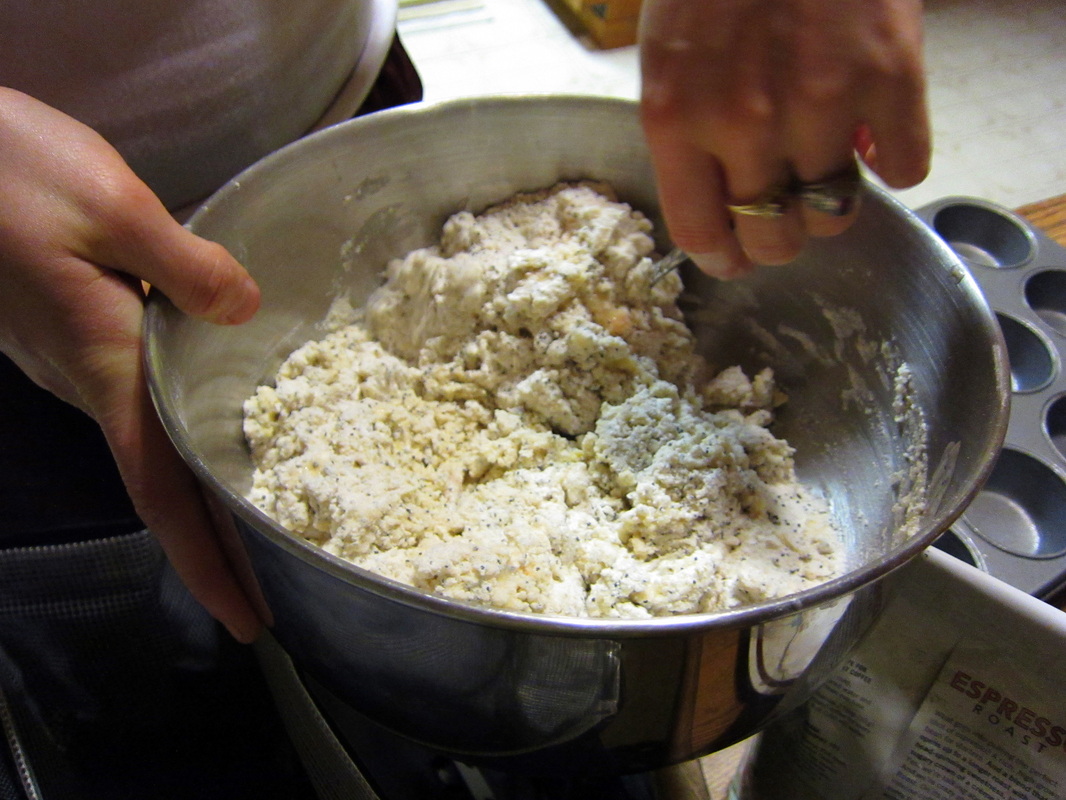
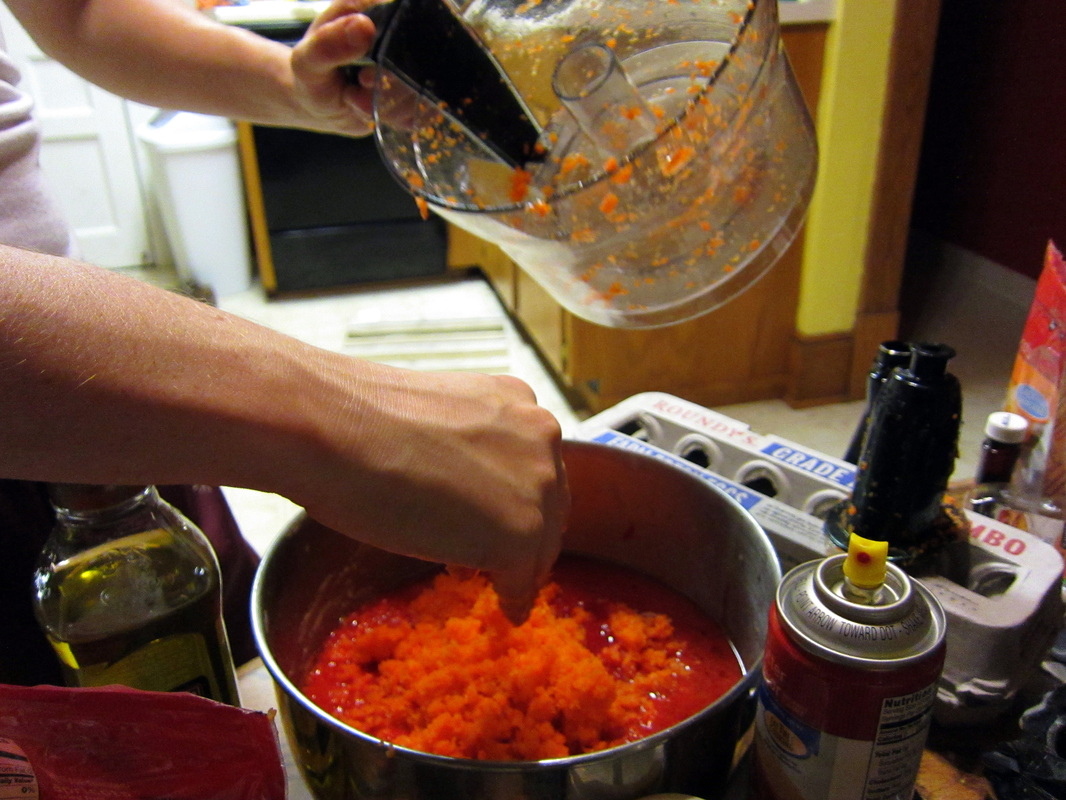
Almost every banana baked good starts off with a bunch of overripe bananas that are then mushed into oblivion. While there are many ways to do this, fork, spoon, food processor, I prefer to use my hands. For one, it's way more fun. Who doesn't love squishing things? Anyway, here's the recipe: Banana, Almond, Oatmeal Breakfast Muffins (Modified from AllRecipes.com) INGREDIENTS: ![]() 1 1/2 cups all-purpose flour 1 cup rolled oats 1/2 cup white sugar 2 teaspoons baking powder 1 teaspoon baking soda 1/2 teaspoon salt 1 t cinnemon 1 egg 3/4 cup milk 1/3 cup vegetable oil 1/2 teaspoon vanilla extract 1 cup mashed bananas Slivered Almonds (optional) ![]() DIRECTIONS: Preheat oven to 350FCombine Dry Ingredients Wisk egg. Add milk, oil, vanilla. Add Bananas Add Dry ingredients to wet ingredients. 
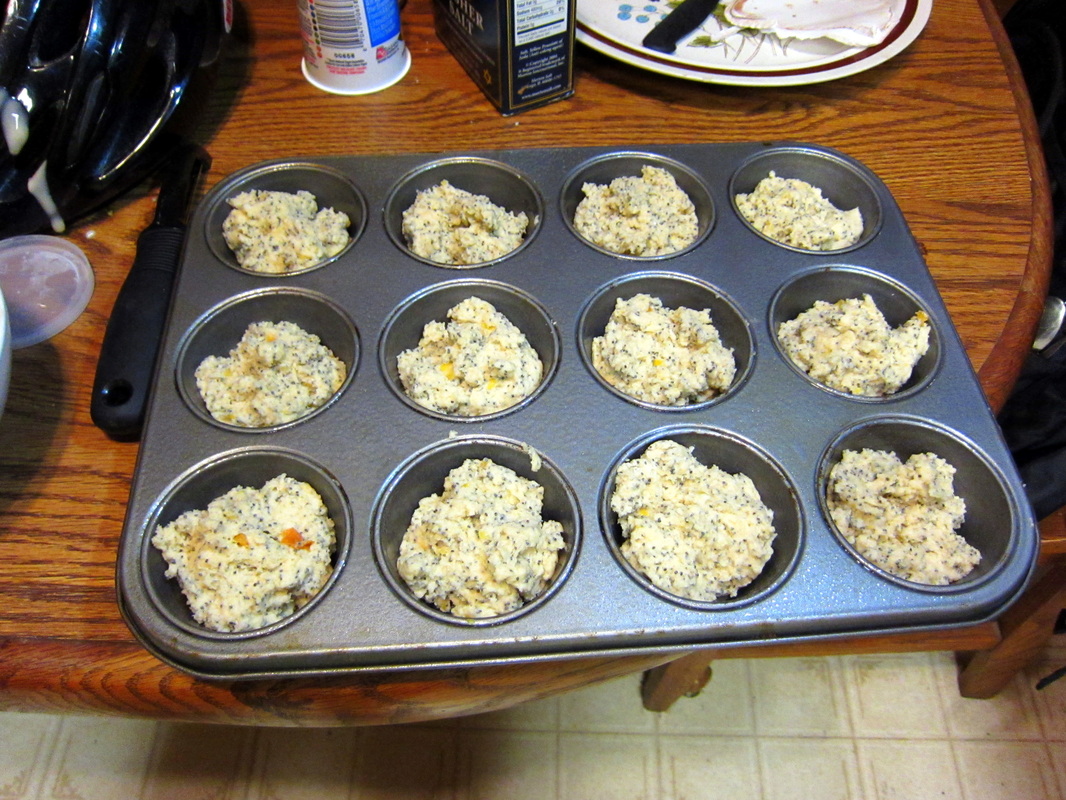
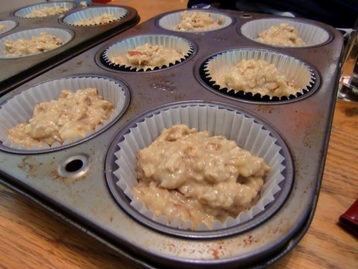
Spoon into greased or lined muffin tin. Add almonds on top (optional)
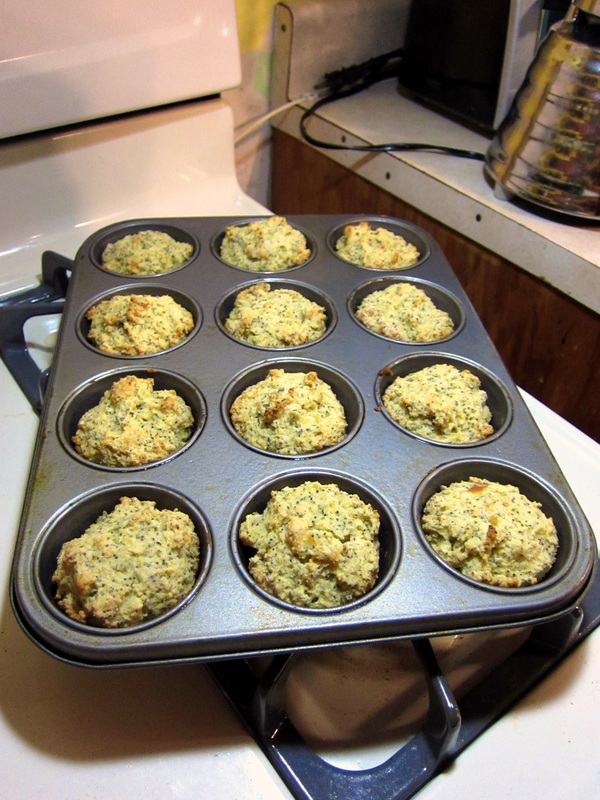
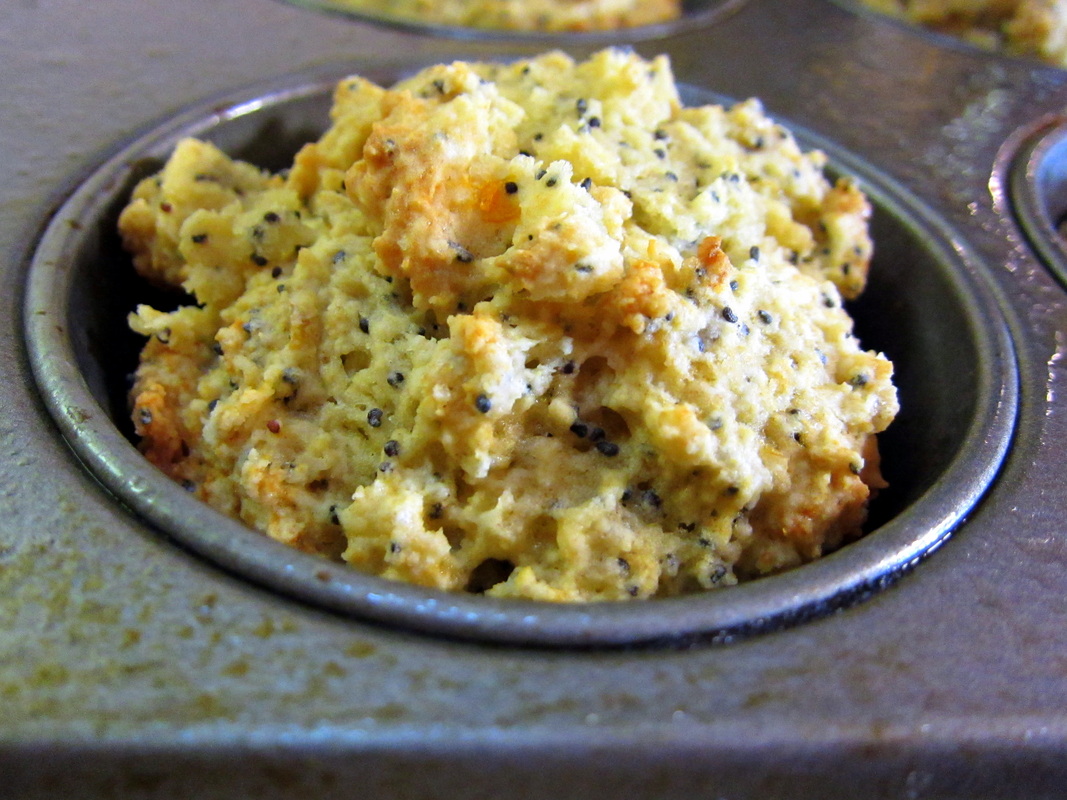
 Bake for 15-20 min Cool. ![]() 
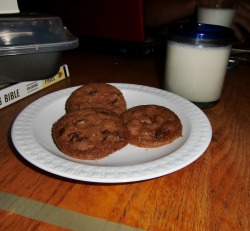
Because this was a birthday treat, I decided to add some degree of sugar on top. The frosting is just a chocolate, cream cheese frosting. This recipe is pretty good. However, I did somethings not in the recipe that I would advise against. For example, don't even think about adding the almonds or anything else for that matter inside the muffins. They are hearty enough as they are. Also, while everything is better with sugar, they don't really need the chocolate frosting on top. ![]() 
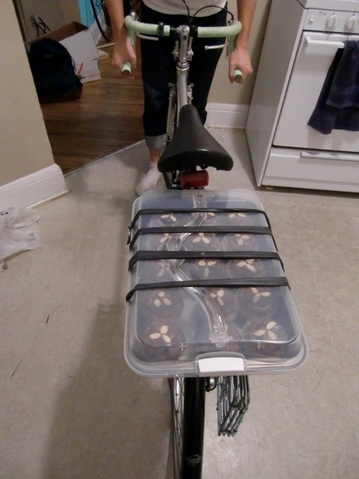
In the dorms, there's no kitchen so these beauties were made at my brother's apartment. This is how I got them home. An additional piece of advice: don't frost the muffins and then transport them; transport them and then frost them. By the time I got up to my room, there was a chocolate massacre inside the 9x13 pan. They never looked this good again. 1 Comment Sweet Tooth 10/23/2010
Have you ever just really had the urge to make something sweet? I know my sweet tooth is unhealthy sometimes, but it is very capable of putting up an excellent argument. Tonight was one of those nights where my sweet tooth was particularly persuasive. I got a text from my brother to go over to a friend's house and make muffins, and "something tasty." After about 45 min, of "I don't know, what do you want to make?" We finally settled on ice cream cake. I wish I could credit the blog from where we got the recipe, but I can't seem to remember the name. No worries though, I do remember the recipe. Fudge Brownie Ice Cream Cake![]() Fudge Brownie Ice Cream Cake Cake 2 sticks of butter 2 cups sugar 4 eggs 1 1/4 cup cocoa powder 1 t baking powder 1 t salt 1 t espresso powder 1 t vanilla 1 1/2 c flour 2 c chocolate chips 1 Quart of Ice Cream We were lazy and just bought Snickers Ice cream from the store but I imagine any chocolaty, caramel-y, or coffee-y ice cream would be good. Fudge Sauce 1 1/2 cup chocolate Chips 2 T butter 1 t espresso powder Toppings Nuts, Caramel Sauce, Powder Sugar ![]() Directions: Cake Preheat oven to 350F In sauce pan over low heat or microwave, melt butter. Remove from heat and add sugar. Turn burner back to low or put back in microwave and stir until butter/sugar mixture looks shiny and smooth. In separate bowl, mix together eggs, coco powder, baking powder, salt, espresso powder, and vanilla. Add butter to mixture. Stir until well combined. Add flour and chocolate chips. Spread batter into 2 lightly greased 9 in round pan. Try to make the pans close to even. Bake for about 20 min. After cake is done, allow to cool, loosen from edges, then move to cooling racks. If time allows, cover and refrigerate. While cakes are cooling, trace one of the 9 in pans onto wax/parchment paper and cut out circle. Place wax paper into pan and scoop 1 quart of ice cream into pan, smooth, cover, and freeze until hard. ![]() Fudge: Melt all ingredients over low heat in sauce pan or in microwave safe bowl. Make sure not to burn. When Ice Cream is hard and cake is cool stack cake, then ice cream, then cake. Depending on how long you let the fudge sit, you may need to reheat it. Drizzle over Ice Cream Cake and add toppings. Warning: This cake is very rich. Cut very small slices when ready to serve. I recently got a new camera, so I had to practice taking some pictures. My friend made Mango, Apricot, Lemon, Poppy Seed muffins and Carrot, Apricot Muffins. Here are some fun, food, practice, pics. I'm in the Mood for Something...Spicy 10/01/2010
With the end of August came the end of summer and thus the end of my summer living arrangement. I moved out of my apartment and back into the wonderful dorms at the University of Minnesota. With this transition meant the loss free time to create new dishes and the kitchen in which to cook them. As can be expected, after just over three months of having home cooked meals, dorm pizza, burgers, and pasta dishes are not exactly healthy nor particularly tasty alternatives. On the plus side, during the summer, creating salads was cumbersome and expensive. Whenever I purchased spinach at the farmers market or grocery store, it would go bad before I could eat it all. In the dorms, there is a salad bar everyday. Although they seem to be the only healthy choice the dining halls offer consistently, a girl gets tired of salads rather quickly. ![]() After a couple weeks of classes and the monotony of salads, I had a craving for a good curry puff. I just needed something to spice up my diet. Finally, after an almost 4 week break, I decided that we were going to have the first _ND of the school year. The menu: Curry Puffs, Eggplant Beef, and Banana Fritters. Curry Puffs and Banana Fritters are both Malaysian specialties. The last time I went to my mother's home in the "Food Capital of the World," Penang, Malaysia, I remember buying a couple of each of these guys off a street vendor. When you bite into a curry puff, the crunch of your teeth breaking through the delicate layers of puff pastry is the perfect introduction to the smooth taste of coconut accented with the gentle heat of the curry. The pork, or in the case of last week's dinner, beef, and potatoes provides a rich, succulent flavor and soft texture juxtaposed against the flaky, buttery outer shell. Just writing about them makes my mouth water. These curry puffs are a family recipe so I feel bad giving it away. Hopefully for those interested, the pictures provided will give you enough information to try to make them yourself. (The puff pastry used for the shells is Peperidge Farm prepared Puff Pastry found in the freezer aisle at the local grocery store). I'm still waiting on pictures from the camera I borrowed, but since we're going into October, I'm just going to publish this now and update it with pictures later. Bruschetta au Chevre 09/25/2010
![]() This is a Bruschetta recipe that is a little expensive, but sure to wow your taste buds. Baguette, sliced Olive Oil Garlic, minced Chevre Kalamata Olives, sliced Basil, julienned Tomatoes, diced ![]() Drizzle Baguette slices with olive oil and top with garlic. Arrange on baking sheet and toast in oven. Combine remaining ingredients in bowl. Spread onto toasted bread. Keep warm in turned off oven until serving. A Post for Pandan 08/27/2010
Pandan, also known as screw pine, has a very subtle, yet distinct sweet taste. When I went to United Noodles to buy the leaf, the elderly Chinese woman at the check out asked me in what dish I would be using it. I told her I was making soy milk. She seemed surprised that a woman of my age would be making it from scratch and responded that she had never used pandan in her cooking. Apparently, this is an ingredient more prevalent in cuisine south of the Chinese border and mainly in desserts. It goes well with the creamy richness of coconut milk in Pandan Chiffon cake or Serikaya (Pandan Jam). In fact, now that I'm thinking about the uses for pandan, those are the only three things I have ever made with it: Soy Milk, Pandan cake, and Serikaya. In this post however, I'm only going to go through the process of making Soy Milk and Serikaya. Soy Milk![]() Soy Milk and Cookies Ingredients: Soy Beans Water Pandan Sugar (Brown, White, Palm, whatever you want. In the past, I've used a mixture of Brown and White mainly because it is readily available. However, my mom prefers Palm Sugar.) You may notice that there are no measurements. This is mainly because I have no idea. After the first time, you can gauge for yourself whether you need more or less of any ingredient. ![]() Tools: Blender Cheesecloth Clips Stock pot ![]() Directions: To make about 12 cups of Soy Milk, put about 1 lb of soy beans into a bowl and soak overnight. It may not look like a lot but trust me, they will expand. On a side note, if you're not going to make the milk the next day, drain your beans and replace the water every 12 hours or so. Otherwise they start to ferment and that's not good. ![]() Prepare a stock pot with at least 2 layers of cheesecloth over the top. Use clothes pins if you can. I didn't have any, so I used a rubber band. This makes it tricky to remove the cheesecloth when you need to squeeze out the milk. I dropped the entire cloth, crumbs and all, into the pot the second time I did this. If you are more coordinated than I am, rubber bands may work just fine. When you arrange the cheesecloth over the pot, do not make it taught; you want to create a slight well when you pour your soy water through. Alternatively, for even clearer milk, you can prepare a large bowl and a stock pot with cheesecloth. This way, you sieve the soy fluid twice. ![]() Drain your soy beans and replace with fresh water right before use. Put 1 cup of soy beans and 2 cups of water in a blender. Pour through cheesecloth. Once your cheesecloth is full, generally after about 4 cups of beans passing through, gather the corners of the cloth and create a pouch making sure to keep all the soy bits inside. ![]() Squeezing Milk Through Cheesecloth Twist the top and squeeze the liquid through the cheesecloth. Reserve the crumbs in a separate bowl. Repeat until you have used all the soy beans. When all the soy beans are gone, put the crumbs in the blender with water, blend and strain again. Keep in mind, 1 cup of crumbs is more dense than 1 cup of soy beans. You will want to put in more water per cup than you did with the whole beans. After the second time through, you can throw out the crumbs or, I'm also told you can make soy bread with them. I personally have never tried that. ![]() Pandan in Soy Milk After squeezing out all the juice you can get from the crushed soy beans, remove the cheesecloth and heat the milk over a low heat, stirring often. Make sure the bottom does not burn. After about half an hour add pandan to the pot. When the pot comes to a boil, turn off the heat, remove the pandan, and add sugar to taste. The boiling point comes on quickly and suddenly. This is not something you can just leave on the stove while you do something else. It will boil over if you are not careful. ![]() Soy Milk and Beans Allow soy milk to cool then transfer to containers and refrigerate. Enjoy! If you refrigerate soy milk, it will stay good for a couple weeks. This is not the same soy milk that you can buy at a typical grocery store. It's much better. Serikaya is the second of three recipes I can think of that use pandan. It is essentially an egg custard but it is often used more like jam. In Malaysia, my cousins and I eat it on toast. My mother used to make it for me in the States as well. Growing up, one of my favorite childhood memories is eating homemade serikaya on toast. You can also buy it at some Asian grocery stores. I have to say, I think my mom would be proud of the batch I made up. It tasted just like Malaysia. When my mom makes this, she uses the microwave. Due to my lack of microwave safe bowls large enough, I used the stove and simply had to stir the mixture constantly to avoid burning. The recipe is as follows: Ingredients: 4 eggs 2 cup sugar 1/2 can of coconut milk 3 pandan leaves Instructions: Beat the eggs and sugar together. Put in pot over low heat. Stir in coconut milk. Stir constantly to avoid burning on the bottom. After the custard starts to come together a little, add the pandan leaves. Cook until desired texture is achieved. When you buy this from the super market, it is smooth, like thick syrup. To get this consistency, after you cook the Serikaya, put it in a blender and blend. If you don't to this, you end up with small chunks. Personally, I prefer the chunks. It gives my mouth something to feel. Along with putting this on toast, another common application is putting it inside a bun creating kaya bao. If you know a good roll recipe, use that. Otherwise, I just buy Rhodes Dough from the grocery store. If you buy the dinner rolls, you can follow the directions below: Allow rolls to defrost and rise on a tray. Keep in mind these will expand a lot. In the mean time, how ever many bao you are making, cut out that many squares or wax paper; 3-4 in squares should do the job just fine. After they are soft, press a ball flat onto the table making the edges thin and the center thicker in comparison. It's like the opposite of shaping a burger. Place about 1 Tablespoon of Kaya in each bun. Grab the edges of the dough and pull over the Kaya. When all the edges come together, twist the bottom and place on a wax paper square. Let rise again. Just before placing them in the oven, brush an egg wash over the tops. Bake according to directions on package. I didn't have time for Pandan Chiffon cake, but perhaps that will be a future post. Also, I feel I must apologize for my lack of pictures in this post. They got deleted off the camera before I could upload them to my computer. The next time I make Soy Milk or Serikaya, I will update this post to be more visually appealing. P.S. It's back to school time for me meaning back to the dorms. Unfortunately I probably will not be doing as much cooking as I have been doing this summer so posting will be even less frequent. Hopefully back to school does not mean my readership will fall as well. There is nothing better than cooling down on a hot summer's day with a cold treat. Today, I'm going to talk about three: Chessecake, Panna Cotta, and Banana Ice Cream. As the Twin Cities seem to be undergoing an oppressively hot summer broken up by a day or so of heavy storms, I can't help but enjoy one of these cold treats every so often. ![]() As I was saying in my last post, Cheesecake isn't as much a cake as it is a custard due to its ingredient composition. As with many things that rise, cracking and/or uneven surfaces are common with this dessert. In order to keep your cheesecake's surface nice and smooth, make sure not to over whip it. Cracking happens because air in the batter is trapped and expands during cooking. When the custard cools it collapses onto itself breaking that sleek, creamy surface. There are thee easy ways to help keep your custard from becoming cracked: 1) Only stir the batter enough to completely combine all the ingredients and that will help keep out any excess air. 2) Bring your oven up to temperature gradually by placing a tray of water on the bottom rack. A slow heating oven will help the bubbles disperse gradually instead of being baked into the cake. 3) Make sure the cheesecake cools gradually as well. Those tips should help get your cheesecake sleek every time. If it doesn't and you still end up with a fault down your beautiful creation, you can always put fruit on it as well. You can see that my cheesecake actually cracked because we cooled it down in the freezer (my friend had to leave the next day) To cover this up, I topped my cheesecake with a triple berry coulis. Both recipes are as follows. ![]() Cheesecake Crust 15 graham crackers, crushed 2 tablespoons butter, melted Filling 4 (8 ounce) packages cream cheese 1 1/2 cups white sugar 3/4 cup milk 4 eggs 1 cup sour cream 1 tablespoon vanilla extract 1 tablespoon lemon juice 1/4 cup all-purpose flour Directions 1.Preheat oven to 350 degrees F (175 degrees C). Grease a 9 inch springform pan. 2.In a medium bowl, mix graham cracker crumbs with melted butter. Press onto bottom of springform pan. Bake for 10 min. Turn off oven when done. 3.In a large bowl, mix cream cheese with sugar until smooth. Blend in milk, and then mix in the eggs one at a time, mixing just enough to incorporate. Mix in sour cream, vanilla, lemon juice and flour until smooth. Pour filling into prepared crust. 4.Turn oven back to 350 degrees F and place cheesecake on middle rack. Place tray of water on the bottom rack and bake cakes for 1 hour. When it's done, the cheesecake should look a little underdone. If it looks done, you've baked it too long and take it out of the oven. If not, turn the oven off, and let cake cool in oven with the door closed for 5 to 6 hours; this prevents cracking. Chill in refrigerator until serving. (If you are in a time crunch like I was, you can stick it in the fridge, or (gasp) the freezer after a couple minutes to let it set. Be advised that your cheesecake will crack if you do it this way. My friend was going back to France the next day so we needed cheesecake now.) Triple Berry Coulis Ingredients 2 cups raspberries, strawberries, and blueberries (cut into large chunks) 3/4 cup Simple Syrup (1/2 cup sugar dissolved into 1/2 cup boiling water) 1 1/2 tablespoons fresh lemon juice 1/2 tablespoon cornstarch dissolved in water (optional) Directions Bring the raspberries, syrup, and lemon juice to a simmer in a heavy medium saucepan over low heat. Simmer, stirring occasionally, until the berries are very soft, about 8 minutes. Thicken with cornstarch if necessary. Strain through a fine-mesh sieve into a bowl; discard the seeds. Cool completely, then cover and refrigerate until ready to use. ![]() Panna Cotta is Italian for "cooked cream." Benvenuti in Italia! I served this after Italian sausage, spinach stuffed shells which despite taking longer than I would have liked, were delicious. This dessert is basically an egg-less custard that is often served with a fruit, or chocolate topping. Served alone, this is a blank canvas that complements any flavor. As my brother described it at the Tuesday Night Dinner where it was served, it's like "sweet, creamy tofu." Almost anything will go well. I served mine with the left over triple berry coulis from the cheesecake. Panna Cotta Ingredients 1/3 cup skim milk 1 (.25 ounce) envelope unflavored gelatin 2 1/2 cups heavy cream 1/2 cup white sugar 1 1/2 teaspoons vanilla extract ![]() Directions 1.Pour milk into a small bowl, and stir in the gelatin powder. Set aside. 2.In a saucepan, stir together the heavy cream and sugar, and set over medium heat. Bring to a full boil, watching carefully, as the cream will quickly rise to the top of the pan. Pour the gelatin and milk into the cream, stirring until completely dissolved. Cook for one minute, stirring constantly. Remove from heat, stir in the vanilla and pour into six individual ramekin dishes. 3.Cool the ramekins uncovered at room temperature. When cool, cover with plastic wrap, and refrigerate for at least 4 hours, but preferably overnight before serving. ![]() Lastly, a quick, cheap way to beat the heat is banana ice cream. At the local grocery store, bananas are about $0.49/pound. They are pretty much the least expensive fruits you can buy. After the bananas are ripe, peel them and chop them into medallions about 1/4 inch thick. Freeze them. After they are frozen, put them on a cutting board and just keep cutting until you get a smooth texture, like ice cream. Once you do it a couple times, you can refine your technique. After the pieces are small enough, it becomes more of a spreading motion with knife. This quick dessert has kept me comfortable throughout this sweltering summer. Cheesecake 07/30/2010
Happy National Cheesecake Day! That's right, July 30th is the unofficial celebration of America's favorite cake, er I mean custard. Despite its name, cheesecake isn't really much of a cake at all. Cakes require flour; cheesecakes don't have that. Instead they're more of a custard as they are composed of mainly eggs, cream, and sugar. Last week, I had a friend from France come and say with me. One night when we went out to dinner, she was excited to see Cheesecake on the dessert menu. Apparently, in France (or at least the southern part) they don't have cream cheese! Who would have thought that the country known for their over 360 different kinds of cheese, cream cheese is not among them. We of course had to make a cheesecake at home before she left. After gently folding through the pages on the internet, we finally found a quick recipe for cheesecake. For you hardcore foodies (who aren't reading this because I know all two of my readers), I would not recommend using the recipe that we did. That being said, we did successfully satisfy our cheesecake craving. I'll write more on this post in about a week. Hopefully I'll get internet in my apartment then. Hopefully This tiny bite of what's to come will wet your appetite for more on cheesecake. Tuesday Night Dinner 07/09/2010
![]() Friday Night Dinner It has been said, "if you give a man a fish, you feed him for a day; if you teach a man to fish, you feed him for life." When I was a sophomore in high school, my mother wanted to make sure that both I and my older brother knew how to "fish" before we left for college. This meant learning how to cook (which I never got to do while I lived in the dorms). When I look back at my and my brother's childhoods, we've always been somewhat involved in the kitchen. We knew how to cut up onions, peel shrimp, and perform other menial tasks (we actually got quite good at that kind of stuff, I suspect it's because my mom didn't want to do those tasks herself so she made us do them). However we never had to take a meal from grocery shopping to prep work to execution to eating. In order to teach us, she made us make a full meal about 2-3 times/month and always on a Friday night. Over the 3 years I did this, it grew to be a popular social event among my friends and laziness in creating the Facebook invitations branded the event as FND for Friday Night Dinner. As it turns out, good food often leads to good friends. I learned how to organize and plan a meal and my time spent in grocery stores looking for ingredients gradually declined. I learned how to prepare many of my mother's family recipes and try to avoid chaos and her yelling at me in the kitchen. Although the meals were often tasty, I still haven't mastered the whole avoiding chaos and yelling bit when I go home and cook. My favorite part of FND happened each time just before the food was set on the table. At this time, I would look around and see myself surrounded by friends and family all sitting down together for a meal that I toiled over for the past hour or two to prepare. Funny stories and good conversation were about to be passed along with a side of gai-lan or mashed potatoes. Although sometimes days would start out rather unpleasant or stressful, at the end of the night, after being with good food and good company, I don't remember ending a single one in a bad mood. While in high school, my parents footed the bill for each of these dinners (which sometimes fed about 20 people), needless to say, these did not continue after I graduated from high school. However, this summer FND has been resurrected and re-adapted as TND, Tuesday Night Dinner. Last Tuesday, July 6, was the first one. My brother and I cooked Char Koay Teow for a few friends. We created a running tab where we can track how much each meal costs and how much everyone owes. With different friends and different food, I personally am excited to see this tradition carry on. Next week we will be having German food prepared by my brother's roommate's girlfriend. There is nothing quite like making friends over a good meal. Spare Ribs 07/09/2010
This cut of meat is a the most inexpensive making it ideal for a poor college kid like me. Although is called a "spare rib," this is not the rib that Adam gave up to create Eve (Sorry, that's a lame joke). There are two predominant explanations for spareribs' name. The first is derived from the German "Rippenspeer" which means "spear ribs," or ribs you roast on a spear/spit. When translated to English, it became "rib speer" which eventually evolved into "spare ribs" or "spareribs," both spellings are generally accepted. The other explanation is that this cut of meat is literally the spare ribs. After the butcher cuts up the pig the last part is generally the ribs. Baby back ribs are taken out first and whatever meat is left becomes spare ribs. Because of their accessibility and the virtual universality of pigs after the Age of Exploration, spareribs are a common dish throughout the world. The dish I made is a family recipe and unfortunately, my mom told me I'm supposed to guard it with my life so unless you're kin, sorry. However it is a very traditional approach to Asian-style ribs so if you Google "Chinese Sweet Ribs" you will get something pretty close. Generally, Asians use shorter cuts of ribs like the rib tips, but the University meat lab had a sale on St. Louis style so I bought those for under $1/lb. St. Louis style come from the mid section of the rib and are thus a bit longer and flatter that other rib sections. This recipe is very simple. All you do is combine all the ingredients in a pot and braise the meat for an hour or so. When you braise meat, it is cooked in liquid at about 160-180F. At this temperature, the collagen in meat dissolves into gelatin. This method is generally used with tougher cuts of meat, like spareribs. However, this can be challenging because at 140F muscle fibers start to lose their juices. If this temperature is sustained for a long time, despite being surrounded by liquid, your meat will feel dry. To avoid this, you want to keep your meat just above the collagen melting level. Not everything in the cooking process is trying to rain on your rib parade. The connective tissue within the meat helps it keep moist and succulent. Once this tissue dissolves, its gelatin holds onto some of the juice that is squeezed from the muscle fibers and helps keep the juices where you want them. In addition, when the meat is simmering and your home is getting that sweet smell, the temperature will occasionally dip below 120F, below the muscle fiber breaking heat. At this temperature, connective tissue is weakened, but not melted, and reduces the amount of time needed to spend above fiber busting heats. As soon as the meat is easily pushed from the ribs, it's done. After an hour or so of cooking, you can finally taste the ribs whose smell has been tantalizing your taste buds during Pizza 06/21/2010
![]() Pizza is a favorite of Americans of all ages. Here in the states, we eat approximately 11,000,000,000 slices of pizza per year. Although the style of pizzas to which we are all are accustomed are uniquely American, it may not surprise you that the concept of pizza is not an American creation. No, it's not Italian either. The origins of this savory pie can be traced back to Ancient Greece. Here, the first pizzas were flat bread with olive oil, herbs, and dates. It was cheap food for the masses. As it spread throughout the Mediterranean it adapted to each new region but remained relatively inexpensive. However, as soon as a few notable nobles acquired a taste for this treat, pizza became somewhat of a delicacy. Legend has it that during the reign of Spanish King Umberto (1878-1900), his wife, Queen Margherita went on an inspection tour of her kingdom. After seeing many of her subjects eating this large flat bread, she ordered a guard to bring her what the peasants were having. Some could say this was the pizza delivery. The Queen loved it so much she asked for it to be served in the court. She commissioned Raffaele Esposito, a pizzaioli in Naples, to make her custom pizza. To please the Queen, he created a pizza with Mozzarella, Basil, and Tomatoes (the colors of the Italian flag) and called it a Pizza Margherita. She loved With the stamp of the Queen's approval, the Pizza Margherita became the standard pizza around the world and Naples became the pizza capital. ![]() Pizza did not come to America until the early 1900s. The first pizzas in the United States were called "Tomato Pies." They are traditionally built with the dough, then the cheese, then the sauce and whatever else met your fancy. Once they hit the shores and moved inward, pizza changed from the traditional thin crust to the popular Chicago style deep dish. Today, Pizza has once again become a food for the masses. As a poor, college student, I appreciate its simplicity and deliciousness. It is one surefire way to attract crowds to any meeting. College students and the rest of America consume about 350 slices of pizza per second. The most popular topping is not one that was found in Italy, but rather something that came about here, Pepperoni. In India, pickled ginger, minced mutton, and paneer cheese are favorites. The two most popular topping combinations in Japan are Mayo Jaga (mayonnaise, potato, and bacon) and eel and squid. Brazilians enjoy green peas on their pies and Russians love a red herring pizza. One of the beautiful things about pizza is you can throw just about anything on it. When I made these pizzas, I emptied my refrigerator and used up anything that was on the verge of going bad: tomatoes, peppers, ham, mushrooms, onions...basically anything and everything. The pizza dough recipe I used is down below. It was a solid base for the toppings and sauce but I would have preferred a puffier crust. Pizza Dough 1/2 – 3/4 c. warm water 1 T. dry active yeast 1 t. sugar 2 c. flour 1 T. vegetable or Olive oil 1/2 t. salt 1. Combine 1/4 c. water with yeast and sugar. Stir to dissolve the yeast, set aside until bubbly about 5 minutes. 2. Mix flour and salt, then add the oil. 3. Stir the yeast mixture into the flour mixture, adding water until it forms a ball you can work with. Knead for a few minutes. Cover with plastic wrap and let stand for 10 minutes 5. Put all the toppings on and bake at 350 or 375 or 425˚. Don't preheat the oven. Bake for 10-15 min or until the bottom is brown and the cheese isn't burnt. |


